


Installing a furnace is a critical task that requires precision, understanding of HVAC systems, and adherence to safety standards. Whether you’re a homeowner looking to understand the process or a budding technician, this guide will walk you through the essential steps of furnace installation, ensuring your heating system operates efficiently and safely.
What is Furnace?
Before diving into the installation process, it’s important to grasp the basics of furnace operation. Furnaces come in various models—gas, electric, and oil are the most common. Each type has its own specific installation requirements, but the overall process shares common steps.
Furnace Installation: Your Ultimate Guide to Installing a Furnace Step-by-Step
Step 1: Preparation and Safety
Safety is paramount. Ensure all power sources are disconnected before beginning the installation. Gather all necessary tools and protective equipment. It’s also crucial to read the manufacturer’s instructions for your specific furnace model.
Step 2: Sizing and Selection
Selecting the right furnace size for your home is essential. An improperly sized furnace can lead to inefficiency and increased wear. Perform a heat load calculation to determine the appropriate size, considering factors like your home’s square footage, climate, insulation quality, and ductwork.
Step 3: Removal of the Old Unit
If replacing an existing furnace, carefully disconnect and remove the old unit. This step is labor-intensive and may involve handling gas lines, electrical connections, and ductwork.
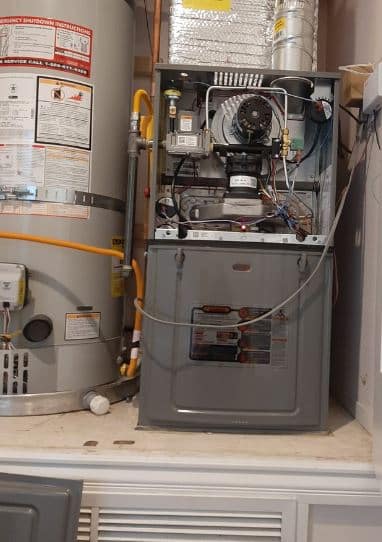
Step 4: Positioning the New Furnace
Place the new furnace cabinet in a location that allows for easy connection to power supplies, ductwork, and vent pipes. Ensure the location supports the weight of the furnace and provides sufficient clearance for maintenance.
Step 5: Ductwork and Venting
Inspect and, if necessary, repair existing ductwork to ensure it’s free of leaks and can handle the new system’s airflow. Proper venting is crucial, especially for gas furnaces, to prevent carbon monoxide buildup.
Step 6: Gas and Electrical Connections
For gas furnaces, connect the gas supply line, ensuring all connections are secure to prevent leaks. For electric furnaces, make sure the electrical connections match the manufacturer’s specifications and comply with local building codes.
Step 7: Condensate Drain Setup
Modern high-efficiency furnaces produce condensate that must be drained properly. Install a condensate drain line that leads to a floor drain or condensate pump.
Step 8: Thermostat Installation
Install a programmable thermostat to maximize energy efficiency. Ensure it’s compatible with your furnace and properly connected.
Step 9: System Testing
Once everything is connected, perform a system test. Check for proper ignition, airflow, and operation. Listen for unusual noises and monitor for any leaks.
Step 10: Final Inspection and Quality Assurance
Refer to a quality assurance checklist to ensure all steps have been completed correctly. It may be necessary to have an HVAC inspection to validate the installation.
After Installation: Maintenance Tips
To maintain your furnace’s efficiency and longevity, follow these maintenance tips:
- Regular Filter Changes: Change your furnace filter monthly to maintain air quality and system efficiency.
- Annual Inspections: Schedule professional inspections annually to catch potential issues early.
- Keep Surroundings Clean: Ensure the area around your furnace is clear to prevent fire hazards and maintain airflow.
- Monitor Carbon Monoxide Detectors: Regularly check that your carbon monoxide detectors are functioning correctly.
Conclusion
Furnace installation is a complex process that should ideally be performed by professionals. However, understanding the steps involved can help homeowners make informed decisions and maintain their systems effectively. Remember, a well-installed furnace not only provides warmth but also ensures the safety and energy efficiency of your home.